.png)
Scheduler Screen
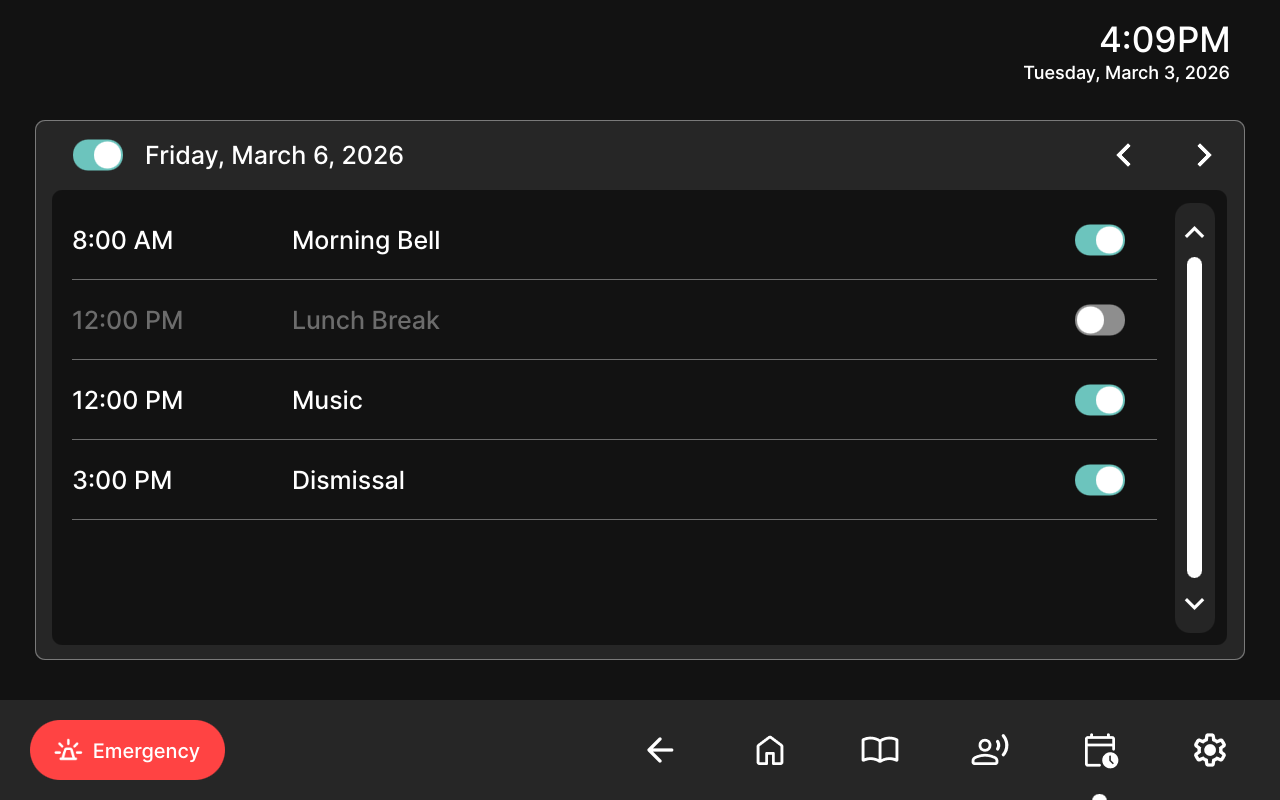
You can view, skip, or restore events scheduled on an 8301/8305 for the coming 7 days (including today).
Note
To ensure consistent event times on both the 8450 and 8301/8305, configure the same time zone on all devices.
Configuring the Scheduler Screen
You can specify which remote Scheduler device to connect to and customize the appearance of the Scheduler screen.
.png)
To configure the Scheduler Screen:
Log in to the device web interface.
Go to Screens → Scheduler.
Configure the General settings:
Background: Select a background image to use for the device.
Show Clock on Screen: Displays the current date and time.
Configure Nav Bar Appearance:
Global: Use the navigation bar appearance settings defined in Basic Settings → Display → Nav Bar Settings.
Custom: Customize the navigation bar appearance.
Configure Remote Scheduler Settings:
Remote Scheduler Static IP Address: Enter the 8301/8305 IP address.
Remote Scheduler Authentication Method: Specify the 8301/8305 API Authentication Method.
If your 8301 Authentication Method is Standard or Basic, specify also the RESTful API Password it uses in Basic Settings → Features → Remote Device RESTful API Password.
You can find this information from the 8301/8305 web interface under Advanced Settings → Admin → API Support section.
Select Save.
Related Links:
Accessing the Scheduler Screen from the Navigation Bar
You can quickly access the Scheduler screen from the navigation bar.
To display the Scheduler icon in the Navigation bar:
Go to Basic Settings → Display.
In the Nav Bar Settings, set Scheduler Icon as Enabled.
Select Save.
The Scheduler icon
 appears in the navigation bar.
Managing Events
You can view, skip, or restore events scheduled on an 8301/8305 for the coming 7 days (including today).
To skip or restore an event:
Go to the Scheduler screen.
Toggle the event off or on to skip or restore it.
The event status is synchronized with the 8301/8305.