Product Overview
The Algo 8401 IP Single-Sided Clock is a high-visibility, NTP-capable, PoE clock that complements your Algo deployments. These clocks are configurable via a web interface and compatible with the 8300 or ADMP, allowing you to monitor and manage them remotely.
Time is displayed using white LEDs that are 2.2", creating a higher contrast than typically used red lights to exceed visibility requirements. White on black is more accessible for those with color blindness and makes reading the time at a distance easier. 
Included
8410 IP Display Speaker
Wall-mount bracket
Bracket attachment screws (4x 6-32 Flat Head Hex Drive Machine Screws)
Terminal Block Plug
5/64" Drive Size Allen Key
Getting Started Sheet
Snap-On Ferrite for Ethernet Cable
Important
This guide contains safety information which should be read thoroughly before permanently installing the product.
Dry Indoor Location Only
The Algo 8401 IP Single-Sided Clock is intended for dry indoor locations only.
CAT5 or CAT6 connection wiring to an IEEE 802.3af or 802.3at compliant network PoE switch must not leave the building perimeter without adequate lightning protection. No wiring connected to the 8401 may leave the building perimeter without adequate lightning protection.
Setup
Installation
The 8401 includes a mounting plate which may be installed over a single or dual gang electrical box or low voltage wall bracket (mud ring) pre-wired with a network cable. Alternatively, the mounting plate may be securely installed to any surface with a network cable entering the bracket through the center hole or surface run using the surface wire channels provided in the bracket.
Install the 8401 to the mounting plate using the supplied four screws.
Installation with Gang Box
Installation without Gang Box
.png)

Connect the network RJ45 plug to the jack in the rear of the clock and secure the clock to the mounting plate or mounting surface, ensuring that the network cable is not pinched or applying any force to the jack.
The green LED flashers will activate and a small blue light on the bottom below the flasher will remain on until boot up is completed – about one minute.
After a few moments, the screen will show the Algo logo.
Warning
PoE++ power is required for optimal operation of this device. Some functionality will be reduced depending on the power connection.
If using a power injector that does not automatically negotiate its power capabilities, go to Advanced Settings → Admin to manually configure Automatic Power Detection versus Forced PoE+ mode.
Attach the snap-on ferrite to the Ethernet cable close to the connector.
Once the unit finishes booting, a configuration message with the IP address will appear on each screen if it is in factory default state. If there is no DHCP server, the 8420 will default to the static IP address 192.168.1.111.
Note
If the IP address does not appear on the screens, press the reset (RST) button to hear the IP address recited over the speakers. The IP address will be repeated until the reset button is turned off.
Access the 8410 IP Display Speaker web interface by entering the IP address into a browser and login using the default password algo.
Accessing the Web Interface
After you enter the IP address for your device into your browser, the web interface will appear.
You must log in to view device settings. The default password is algo. This password can be changed under Advanced Settings → Admin after logging in. Changing the default password is highly recommended if the device is directly connected to a public network.
Important
The Save button must be clicked to apply any changes made in the web interface.
Web Interface Setup
Connect the 8401 to an IEEE 802.3af PoE network switch. The clock colon separating hours and minutes will illuminate blue until boot-up is completed (about 1 minute).
Find your device IP address by downloading the Algo locator tool: www.algosolutions.com/locator. The tool is only available for Windows computers.
Type the device IP address into a web browser to access the web interface and configure your device for testing. Note that these devices may be configured using centralized provisioning or the Algo Device Management Platform (ADMP).
If an NTP (Network Time Protocol) server is available on the network, the clock time will automatically synchronize and display with network time. The time zone can be changed in the web interface.
Check Device Status
By default, the Status page is available with and without a login. The Status page can be made exclusive to logged-in users via Advanced Settings → Admin → General → Show Status Section on Status Page when Logged Out.
The Status page contains information such as:
Device Name | IPv4 |
Provisioning Status | PoE Detection |
Call Status | Date/Time |
MAC |
Clock Configuration
Clock Settings
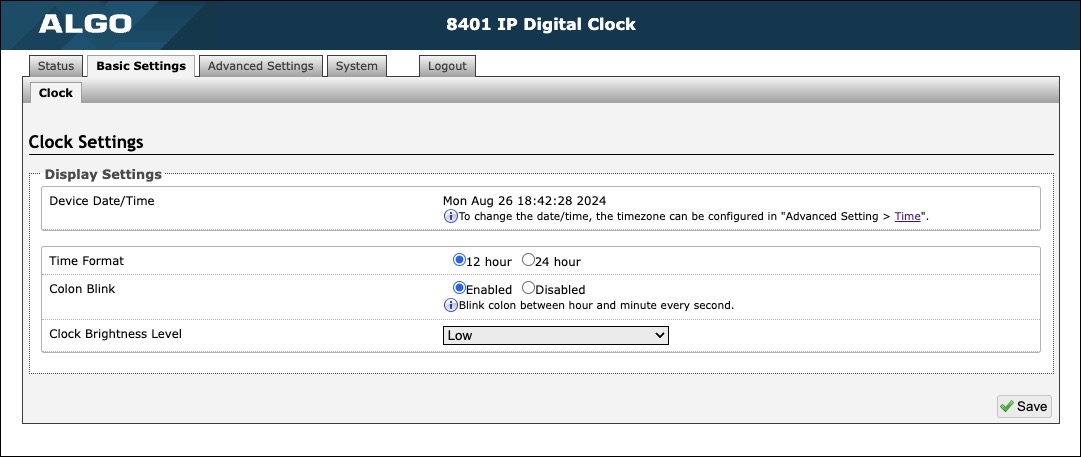
Clock Settings | |
|---|---|
Device Date/Time | View the set time for the device. The timezone can be reconfigured in Advanced Settings → Time. |
Time Format | Set the clock to display in 12 hour or 24 hour format. |
Colon Blink | Enable or disable the colon blinking every second. |
Clock Brightness Level | Set the clock brightness to Off, Low, Medium, or High. |
Advanced Settings
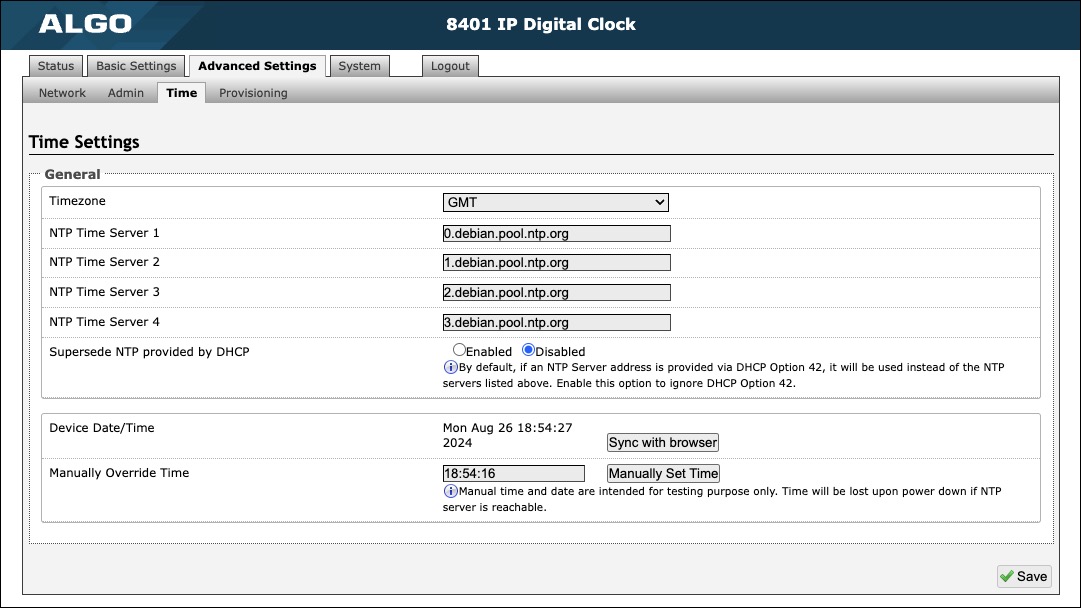
Advanced Time Settings | |
|---|---|
Timezone | Use the dropdown to select the timezone required for your clock. |
NTP Time Server | The interface will attempt to use Time Server 1 and work down the list if one or more of the time servers become unresponsive. These settings are pre-populated with public NTP servers hosted on the internet. To use these, the device requires internet connection. Alternatively, this can be customized to point the device to any other NTP server hosted or premise-based. |
Supersede NTP provided by DHCP | By default, if an NTP Server address is provided via DHCP Option 42, it will be used instead of the NTP servers listed above. Enable this option to ignore DHCP Option 42. |
Device Date/Time | This field shows the current time and date set on the device. If you are testing the device on a lab network that does not have access to an external NTP server, click Sync with browser to temporarily set the time on the device. This time value will be lost at power down or overwritten if connection to the NTP server is available. Time and date are used for logging purposes and the scheduler feature. |
Manually Override Time | Manual time and date are intended for testing purposes only. Time will be lost upon power down if the NTP server is reachable. |
Integration
API
Algo RESTful API can be used to access, manipulate, and trigger Algo endpoints on your network through HTTP/HTTPS requests.
Requesting systems can interact with Algo devices through a uniform and predefined set of stateless operations. See the Algo RESTful API Guide for more details.
To configure API settings, use the web interface and navigate to Advanced Settings → Admin → API Support. 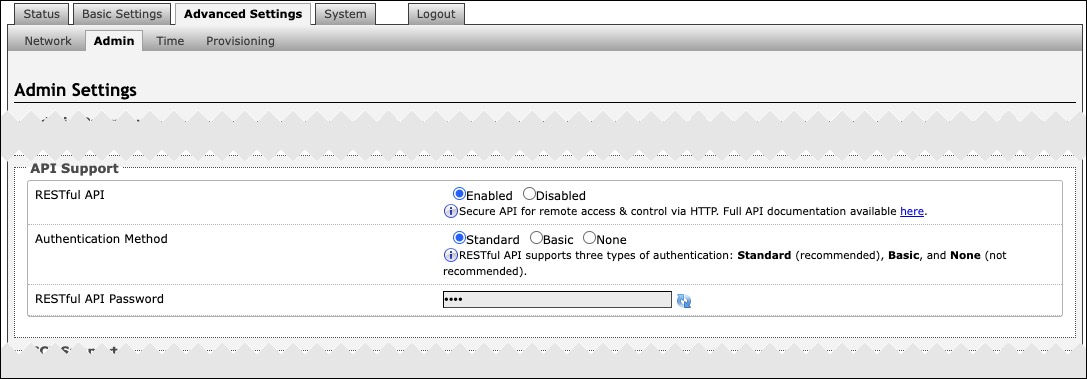
API Support | |
|---|---|
RESTful API | Disabled by default. Enable a secure API for remote access and device control via HTTP. For more information, see the Algo RESTful API Guide. |
Authentication Method | Speak to your IT Administrator for more information. |
RESTful API Password | Speak to your IT Administrator for more information. |

SCI Support | |
|---|---|
SCI | Disabled by default. Simple Control Interface (SCI) is a separate control interface for certain applications. Its primary purpose is to support phones that may have programmable keys that can only send out HTTP GET requests. |
SCI Password | Enter your SCI password. |
Device Management
ADMP
The Algo Device Management Platform (ADMP) is a cloud-based device management solution to manage, monitor, and configure Algo IP endpoints from any location. Devices can be easily grouped via a tagging functionality, allowing devices to be coded by district, department, or function to easily oversee many devices. Devices can be supervised for connectivity and email-based notifications can be sent should devices go offline, allowing for a real-time overview of device status.
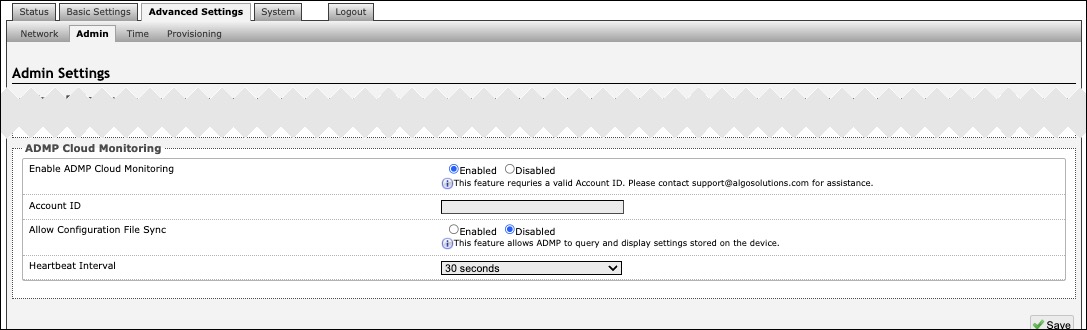
To connect your device to your ADMP account, use the web interface and navigate to Advanced Settings → Admin → ADMP Cloud Monitoring.
Note that if you choose to use ADMP to manage your devices, the Algo 8300 IP Controller cannot be used at the same time.
To learn more about ADMP and how to purchase a license, visit the website.
ADMP Cloud Monitoring | |
|---|---|
Enable ADMP Cloud Monitoring | The Algo Device Management Platform (ADMP) simplifies the process of managing, monitoring, and maintaining Algo devices from any location. This feature requires a valid Account ID. To learn more about ADMP and how to purchase a license, visit the website. |
Algo 8300 IP Controller
The Algo 8300 IP Controller is designed for centralized on-premise or local network Algo endpoint monitoring and supervision. Any Algo SIP endpoint device, including the 8507, can be monitored on the network via the 8300 dashboard.
Note that if you choose to use the Algo 8300 IP Controller to manage your devices, ADMP cannot be used at the same time.
Learn more about the Algo 8300 IP Controller.
SNMP
Simple Network Management Protocol (SNMP) can be used to monitor and manage your device.
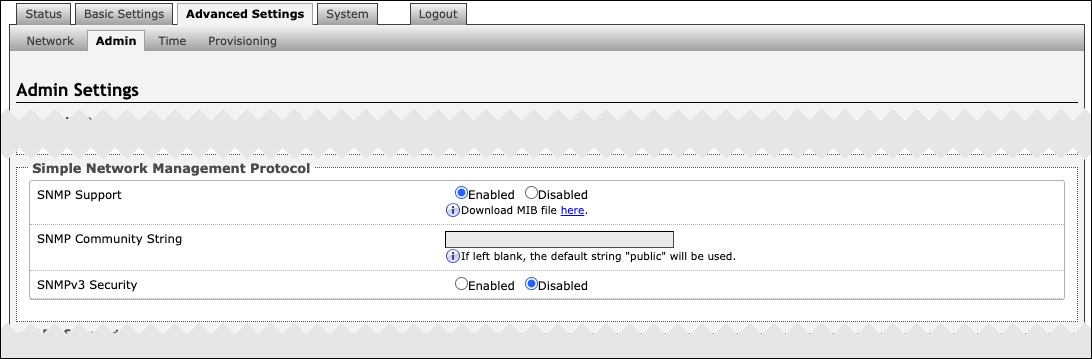
To configure your SNMP settings, use the web interface and navigate to Advanced Settings → Admin → Simple Network Management Protocol.
SNMP | |
|---|---|
SNMP Support | Disabled by default. The existing setting will respond to a simple status query for automated supervision. |
SNMP Community String | Speak to your IT Administrator for more information. |
SNMPv3 Security | Speak to your IT Administrator for more information. |
System Configuration
Network Settings
Common | |
|---|---|
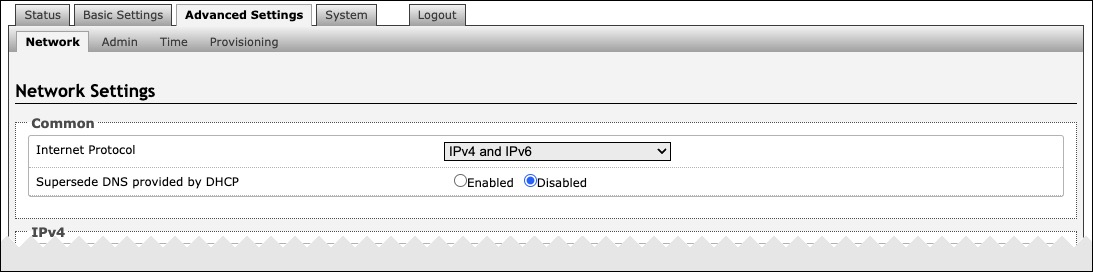
Internet Protocol | Use the dropdown to select IPv4 Only or IPv4 and IPv6. If IPv6 is also configured, it will have to be set up via DHCP or statically, similarly to the IPv4. |
Supersede DNS provided by DHCP | This setting will not appear if the selected Internet Protocol is set to Static. |
DNS Servers | This setting will appear if the Internet Protocol is set to Static or when Supersede DNS provided by DHCP is enabled. |
IPv4 | |
|---|---|
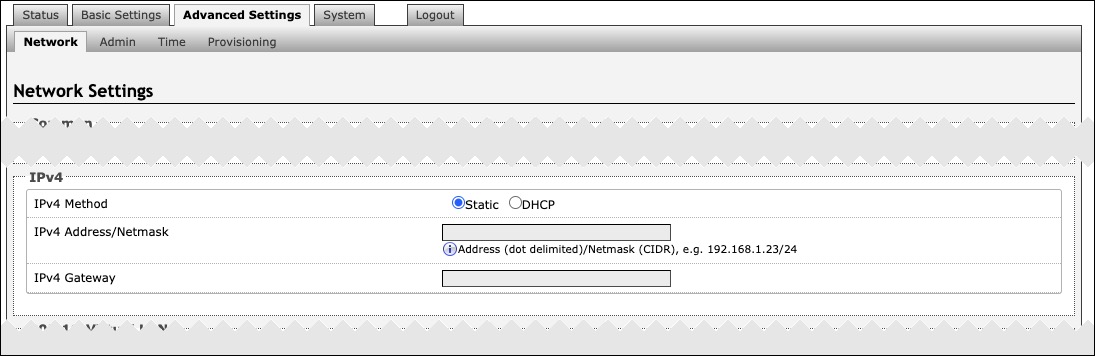
IPv4 Method | The device can be set to a static or DHCP IP address. |
IPv4 Address/Netmask | Enter the static IP address and netmask (CIDR format) for the device (e.g., 192.168.1.23/24). |
IPv4 Gateway | Enter the gateway address. |
IPv6 | |
|---|---|
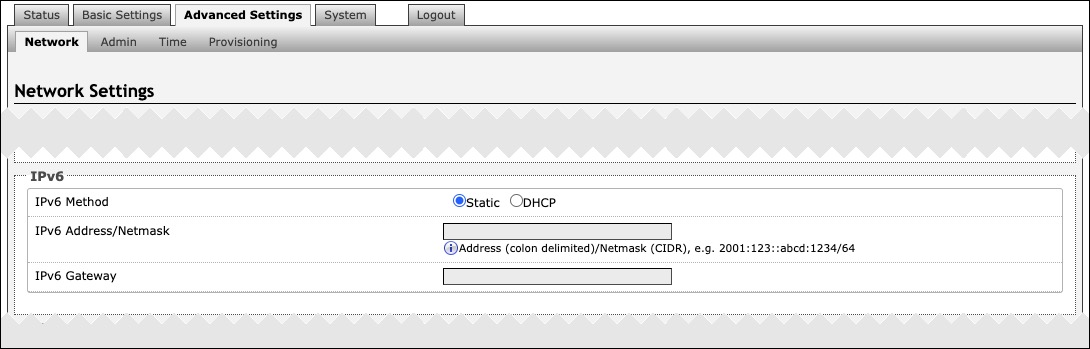
IPv6 Method | The device can be set to a static or DHCP IP address. |
IPv6 Address/Netmask | Enter the static IP address and netmask (CIDR format) for the device (e.g., 2001:123::abcd:1234/64). |
IPv6 Gateway | Enter the gateway address. |

ICMPv6 Options | |
|---|---|
Destination Unreachable Messages | Enable to restrict traffic by filtering ICMPv6 packets. |
Neighbor Discovery Redirect Messages | Enable to restrict traffic by filtering ICMPv6 packets. |
Anycast Echo Replies | Enable to restrict traffic by filtering ICMPv6 packets. |
Enable Rate Limiting Outbound Messages | Enable to limit the device to respond to other network devices at the specified rate below and prevent it from receiving multiple requests at the same time. |
Rate Limit (packets per second) | Specify the packets per second allowed for Rate Limiting Outbound Messages. |
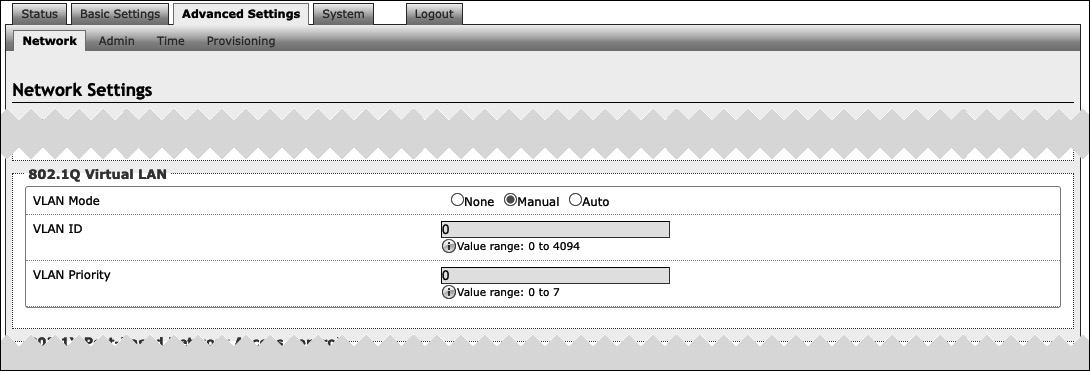
If the device is using VLAN, you will need to be on the same VLAN to access the web interface.
802.1Q Virtual LAN | |
|---|---|
VLAN Mode | VLAN tagging is the networking standard that supports Virtual LANs (VLANs) on an Ethernet network. The standard defines a system of VLAN tagging for Ethernet frames and the accompanying procedures to be used by bridges and switches in handling such frames. The standard also provides provisions for a quality-of-service prioritization scheme known as IEEE 802.1p and defines the Generic Attribute Registration Protocol. |
VLAN ID | Specify the VLAN that the Ethernet frame belongs to. The hexadecimal values 0x000 and 0xFFF are reserved. All other values may be used as VLAN identifiers, allowing up to 4094 VLANs. |
VLAN Priority | Set the frame priority level. Otherwise known as Priority Code Point (PCP), VLAN Priority is a 3-bit field that refers to the IEEE 802.1p priority or frame priority level. Values are from 0 (lowest) to 7 (highest). |
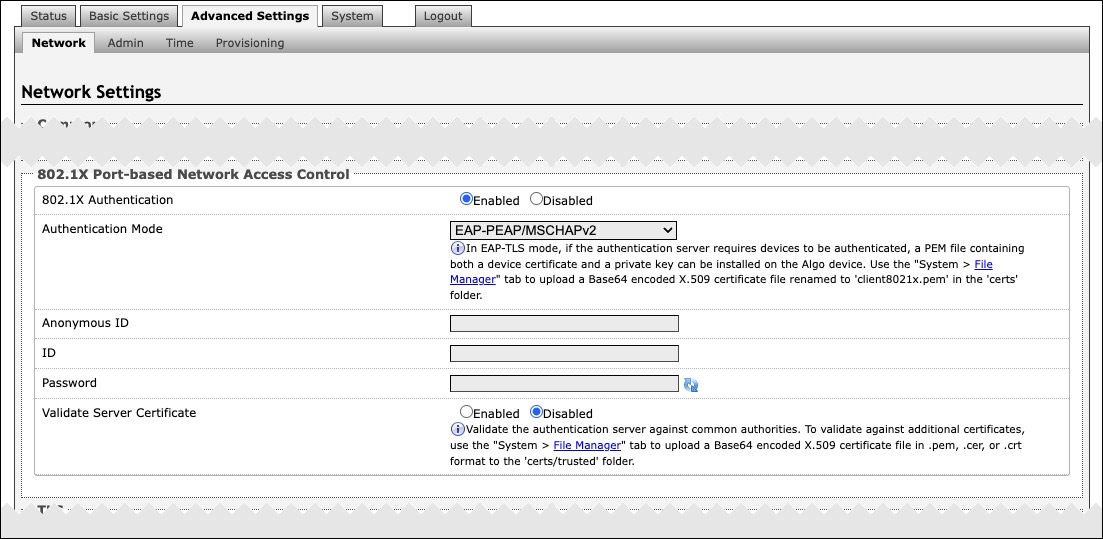
802.1X Port-based Network Access Control | |
|---|---|
802.1x Authentication | Enable to add credentials to access LAN or WLAN that have 802.1X network access control (NAC). You can ask your IT Administrator for this information |
Authentication Mode | Select the desired authentication mode. |
Anonymous ID | If configured, the device will send the anonymous ID to the authenticator instead of the 802.1X client username. |
ID | The ID should contain a string identifying the IEEE 802.1X authenticator originating the request. Ask your IT administrator for details. |
Password | Ask your IT administrator for details. |
Validate Server Certificate | Enable to validate the authentication server against common authorities. To validate additional certificates, go to the System → File Manager to upload a Base64 encoded X.509 certificate file in .pem, .cer, or .crt format to the certs folder. |
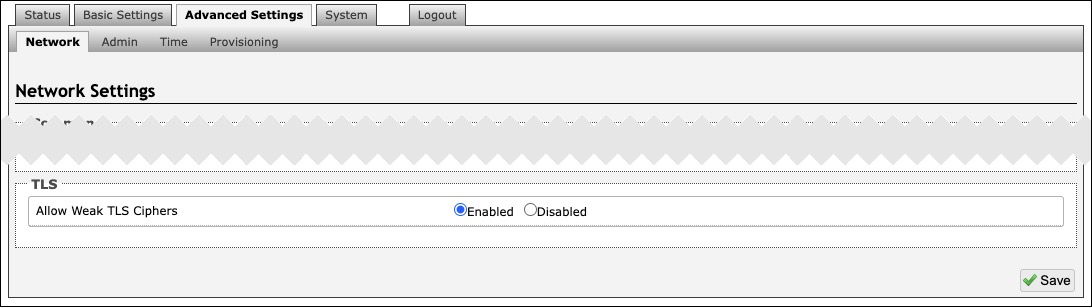
TLS | |
|---|---|
Allow Weak TLS Ciphers | Enables compatibility with legacy systems that may not support the most current encryptions standards |
Admin
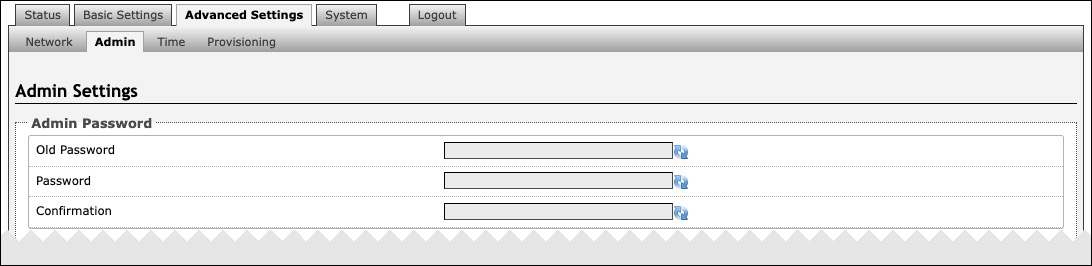
Admin Password | |
|---|---|
Old Password | Enter the old admin password. The default password when you first get the device is algo. |
Password | Enter a new admin password to log into the device web interface. Make sure the new password is stored safely. If the password is forgotten, you must reset the device entirely with the Reset Button to restore the default password. All other settings will be reset to the original default settings as well. |
Confirmation | Re-enter your new admin password. |
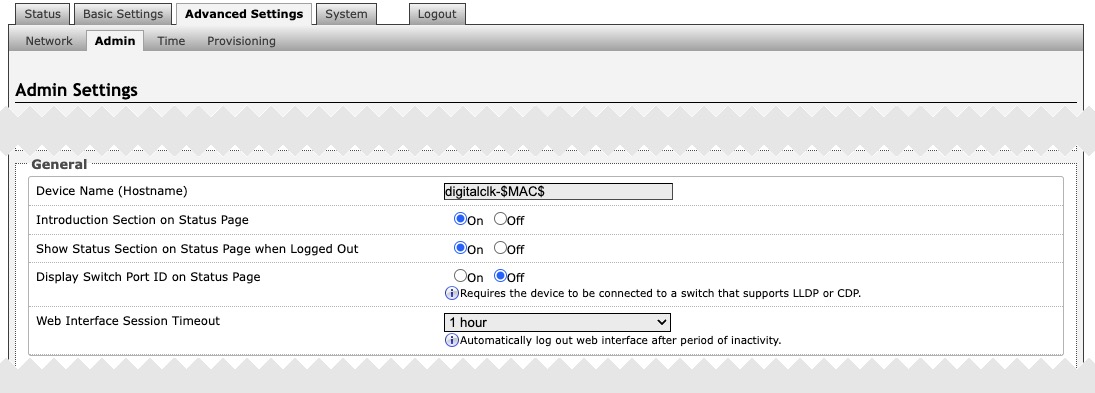
General | |
|---|---|
Device Name (Hostname) | Add a name to identify the device in the Algo Network Device Locator Tool. |
Introduction Section on Status Page | Turn On to show the introduction text on the login screen. |
Show Status Section on Status Page when Logged Out | Turn On to allow others to view the status page without logging in. If turned Off, the settings and configurations on the status page will be hidden entirely unless a user is logged in to ensure only trusted users can view device information. |
Display Switch Port ID on Status Page | Turn On to display the Switch Port ID on the Status Page. This option is only possible if the device is connected to a switch that supports LLDP or CDP. |
Web Interface Session Timeout | Set the maximum duration of inactivity to log a user out of the web interface automatically. |
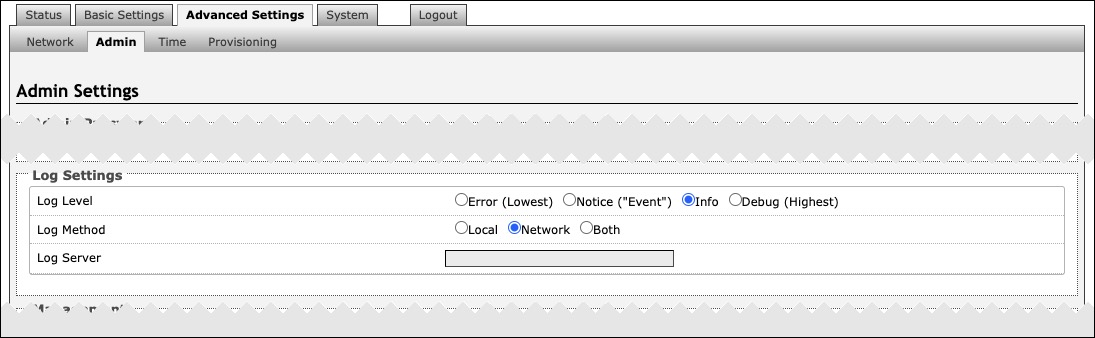
Log Settings | |
|---|---|
Log Level | This setting should only be used after consulting with the Algo support team. |
Log Method | Select a Log Method:
|
Log Server | Enter the Syslog server address provided by your IT administrator. |
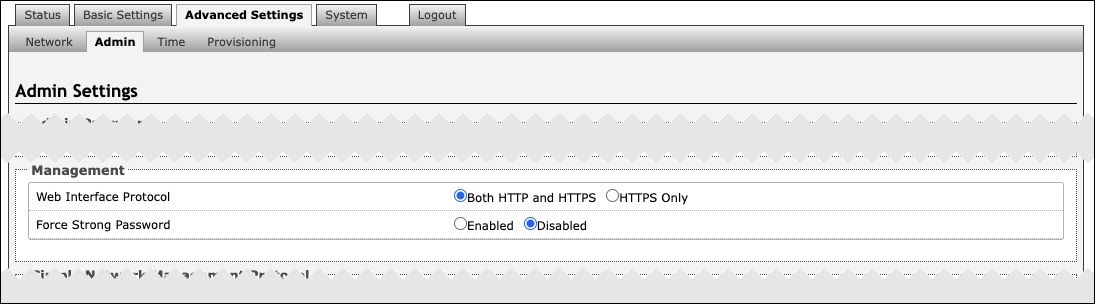
Management | |
|---|---|
Web Interface Protocol | HTTPS is always enabled on the device. HTTP is enabled by default but may be disabled. To do so, select HTTPS Only mode so requests are automatically redirected to HTTPS. |
Force Strong Password | When Enabled, you can enforce a secure password for the device web interface for additional protection. The password requirements for a strong password are:
|

SNMP | |
|---|---|
SNMP Support | Disabled by default. The existing setting will respond to a simple status query for automated supervision. |
SNMP Community String | Speak to your IT Administrator for more information. |
SNMPv3 Security | Speak to your IT Administrator for more information. |

API Support | |
|---|---|
RESTful API | Disabled by default. Enable a secure API for remote access and device control via HTTP. For more information, see the Algo RESTful API Guide. |
Authentication Method | Speak to your IT Administrator for more information. |
RESTful API Password | Speak to your IT Administrator for more information. |
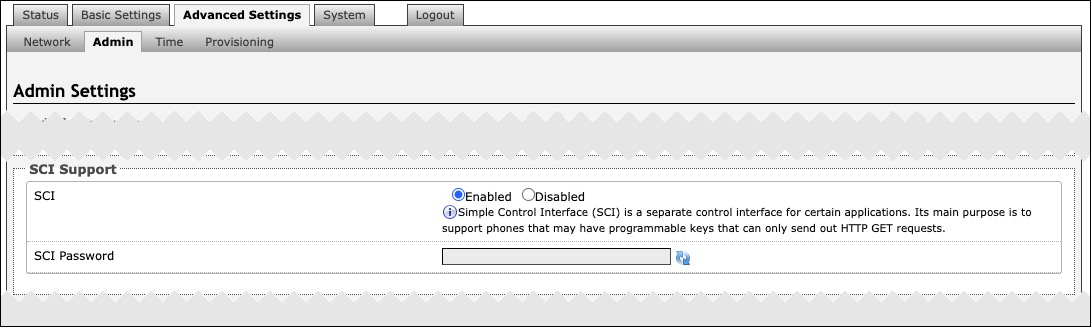
SCI Support | |
|---|---|
SCI | Disabled by default. Simple Control Interface (SCI) is a separate control interface for certain applications. Its primary purpose is to support phones that may have programmable keys that can only send out HTTP GET requests. |
SCI Password | Enter your SCI password. |
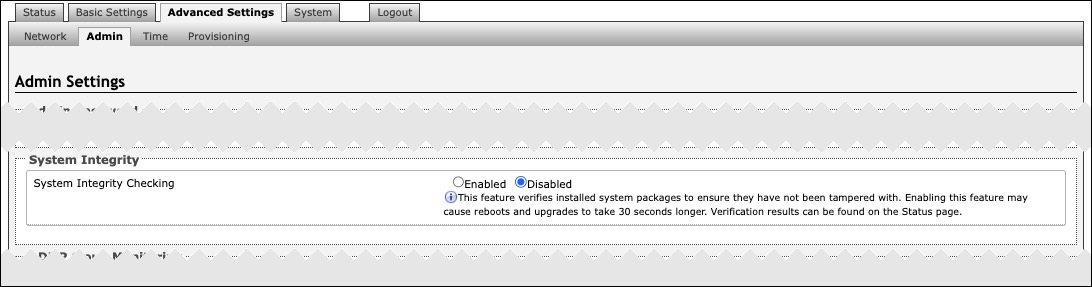
System Integrity | |
|---|---|
System Integrity Checking | Enable this feature to verify that installed system packages have not been tampered with by running a check. Enabling this feature may cause reboots and upgrades to take 30 seconds longer. Verification results can be found on the Status tab. |

ADMP Cloud Monitoring | |
|---|---|
Enable ADMP Cloud Monitoring | The Algo Device Management Platform (ADMP) simplifies the process of managing, monitoring, and maintaining Algo devices from any location. This feature requires a valid Account ID. |
Account ID | Enter the account ID listed on the Settings page of your ADMP account. |
Allow Configuration File Sync | Enable ADMP to query and display settings stored on the device. |
Heartbeat Interval | Select how often ADMP should check the status of your device. |
Provisioning
Algo devices can be provisioned through a provisioning server or zero-touch provisioning (ZTP).
System administrators can provision multiple Algo devices together, eliminating the need to log into each endpoint web interface. After configuration or firmware files are placed on a provisioning server, Algo devices can be instructed to fetch these files and apply the settings.
Algo also offers a ZTP service that is meant to be used as a redirection service to your provisioning server or to configure your device with an Algo Device Management Platform (ADMP) account. ZTP is enabled by default and occurs before any other provisioning step. It will be disabled automatically after any other provisioning settings are changed on the device for the first time.
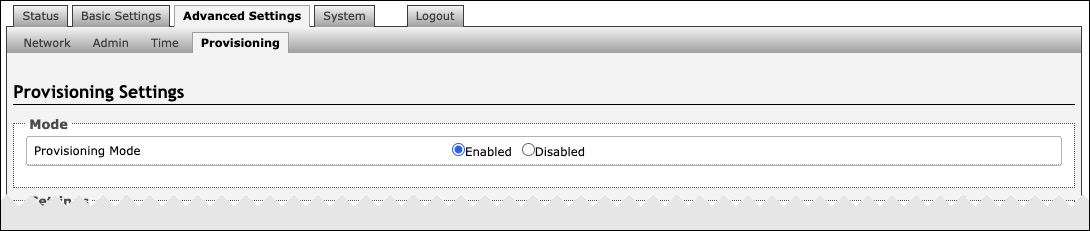
Mode | |
|---|---|
Provisioning Mode | Enabling provisioning allows installers to pre-configure the device on a network before installation. This is typically done for large deployments to save time and ensure consistent setups. |

Settings | |
|---|---|
Server Method | Set to Auto by default. Select a Server Method.
|
Static Server | Enter the server address or domain. |
Download Method | Select your preferred method for downloading provisioning files. The options are:
|
Validate Server Certificate | Enable to verify the server. This checks if the certificate provided by the server is signed by any CAs included in the list of trusted CAs (used by the Debian infrastructure and Mozilla browsers). If a certificate signed by any of these CAs is received, that server will be trusted. |
(FTP) Auth User Name | Speak to your IT Administrator for more information. |
(FTP) Auth Password | Speak to your IT Administrator for more information. |
(HTTP) Auth User Name | Speak to your IT Administrator for more information. |
(HTTP) Auth Password | Speak to your IT Administrator for more information. |
(HTTPS) Validate Server Certificate | Speak to your IT Administrator for more information. |
(HTTPS) Auth User Name | Speak to your IT Administrator for more information. |
(HTTPS) Auth Password | Speak to your IT Administrator for more information. |
Config Download Path | Enter the path where the configuration file is located within the provisioning server (e.g., algo/config/8401). |
Firmware Download Path | Enter the path where the configuration file is located within the provisioning server (e.g., algo/config/8401). |
Partial Provisioning | Enable to allow support for “-i” incremental provisioning files. Disable for enhanced security if this is not required. |
Check-sync Behavior | Select Always Reboot to set the device to always reboot despite other settings. |
Sync Start Time | Set a time (HH:mm:ss) for the device to perform a sync according to the Check-sync Behavior setting. Leave this blank if not needed. |
Sync End Time | If set, the device will sync randomly in the window between Sync Start Time and Sync End Time. Setting an End Time earlier than the Start Time indicates an overnight period. Leave blank to lank to sync exactly at the set start time. |
Sync Frequency | Select the sync frequency. Frequency can be set to Daily or Selected Days Only. |
Sync Days | Select the days of the week for syncs to occur. |
MD5 Checksum
If using TFTP as a download mode, a .md5 checksum file must be uploaded to the provisioning server In addition to the .conf file. This checksum file is used to verify that the .conf file is transferred correctly without error.
To generate a .md5 file, you can use tools such as http://www.fourmilab.ch/md5. To use this tool, simply download and unzip the .md5 program in a command prompt. The correct .md5 file will be generated in the same directory. To generate lowercase letters, use the “-l” parameter.
Generating a generic configuration file
This configuration file is device-generic in terms of MAC address and will be used by all connected 8507 devices.
If using a generic configuration file, extensions and credentials must be entered manually once the 8507 has automatically downloaded the configuration file.
To see Algo’s SIP endpoint provisioning guide, visit www.algosolutions.com/provision
Generating a specific configuration file
The specific configuration file will only be downloaded by the 8507 with the MAC address specified in the configuration file name.
Since all necessary settings can be included in this file, the 8507 will be ready to work immediately after downloading the configuration file. The MAC address of each 8507 can be found on the back label of the unit.
To see Algo’s SIP endpoint provisioning guide, visit www.algosolutions.com/provision
System Maintenance

Backup/Restore Configuration | |
|---|---|
Download Configuration File | Save configuration settings to a text file for backup or to set up a provisioning configuration file. |
Restore Configuration File | Restore settings by uploading a backup file. |
Restore Configuration to Defaults | Reset all device settings to factory default values. |
Backup/Restore All User Files | |
|---|---|
Download Backup Zip File | Download the device configuration settings and the files in File Manager (ex., certificates, licenses, and tones) to a backup ZIP file. |
Restore from Backup Zip File | Restore the device configuration settings and files in File Manager (ex., certificates, licenses, and tones) by uploading a backup zip file. |
Restore All Settings and Files to Defaults | Reset the device configuration settings. All preloaded and uploaded files, including tone files, will be deleted. |
Reboot | |
|---|---|
Reboot the Device | Reboots the device. |
Firmware
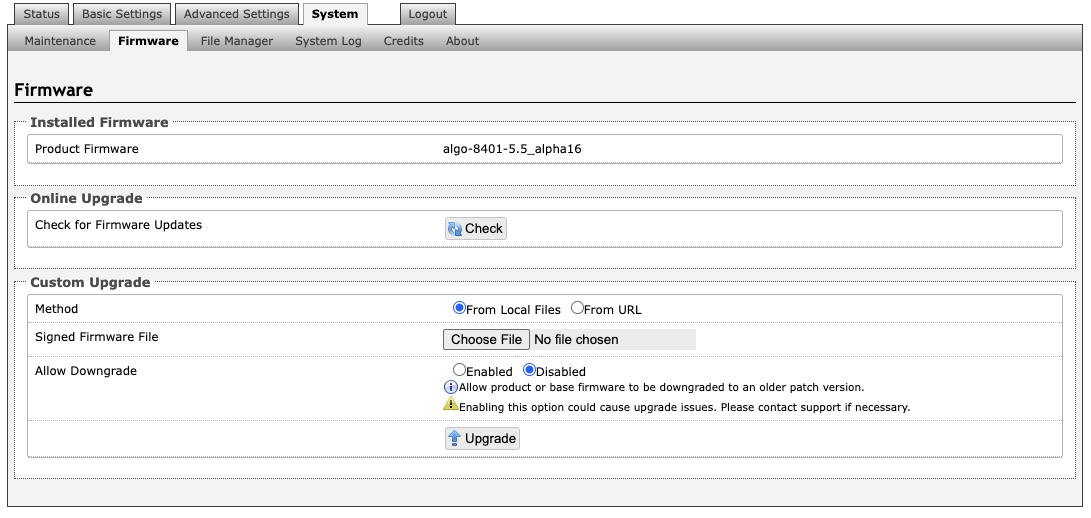
Installed Firmware | |
|---|---|
Product Firmware | Displays the current firmware on the device. |
Online Upgrade | |
|---|---|
Check for Firmware Updates | Click** Check** to check for the latest firmware. If the firmware is up to date, Latest Firmware will state Firmware up to date. If your firmware is outdated, the new firmware availability will be listed. Internet connection is required. |
Custom Upgrade | |
|---|---|
Method | Select a method for firmware upgrades to occur. This can be done From Local Files or From URL. |
Signed Firmware File | Use to upgrade firmware from a local file. To do this, download the firmware file from https://www.algosolutions.com/firmware-downloads/ then upload the file by clicking on Choose File and selecting the firmware file. |
Upgrade URL | Instead of downloading the firmware file https://www.algosolutions.com/firmware-downloads/, you may add the download link here instead. |
Allow Downgrade | Enable to allow product or base firmware to be downgraded to an older patch version. Enabling this option could cause future upgrade issues. |
File Manager
The 8401 has 1GB of storage space for additional files.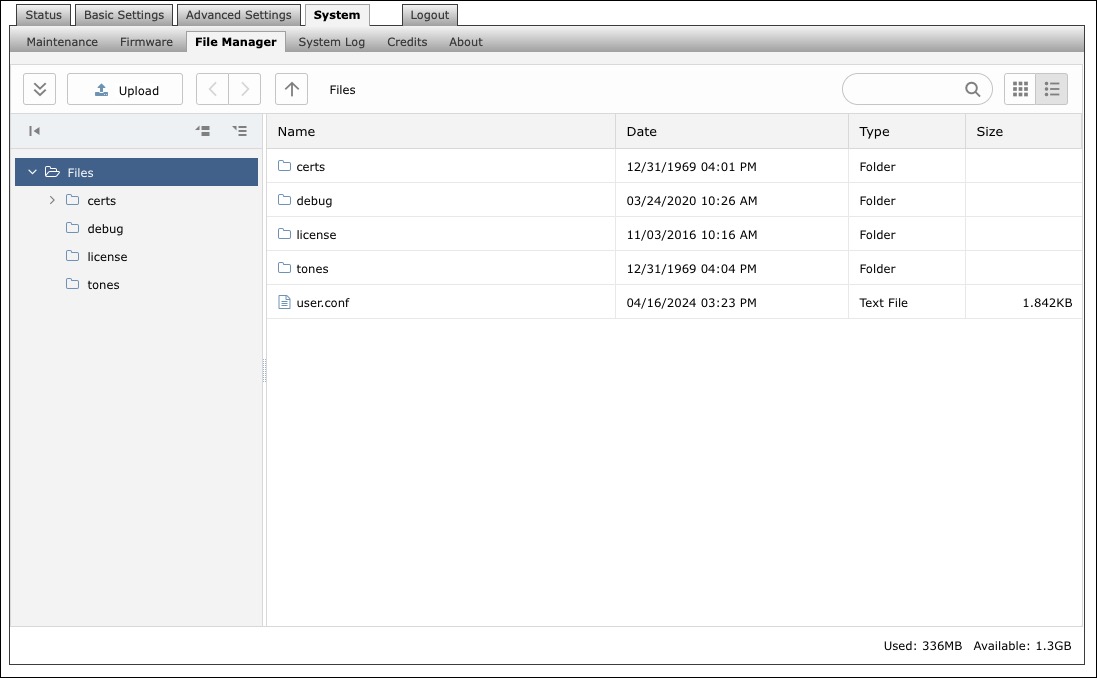
certs Folder
If you have enabled Validate Server Certificate under Advanced Settings →Advanced SIP or Advanced Settings → Provisioning and want to validate against additional certificates, you can upload them here.
To install a public CA certificate on the Algo device, follow the steps below:
Obtain a public certificate from your Certificate Authority (Base64 encoded X.509 .pem, .cer, or .crt).
Open the certs folder in the web interface by going to System →File Manager.
Upload the certificate files into the certs folder by clicking Upload in the top left corner of the file manager and select the certificate.
Reach out to support@algosolutions.com to get the complete list of pre-loaded trusted certificates.
debug Folder
If you have any challenges with the device and work with the Algo support team to overcome or fix them, the debug folder will be used. The device will generate files containing information about the device and put them in the debug folder. You do not need to use this folder unless directed to by the Algo support team.
license Folder
If you would like to use Informacast on a device that hasn't been bundled with an Informacast license, you will need to purchase a license and put it into the license folder in the file manager.
tones Folder
Custom audio files may be uploaded to play notifications. Audio files should be stored in the tones directory.
Existing files may be modified by downloading the original file, making the desired changes, then uploading the updated file with a different name. To download, right-click the tone and click Download.
Audio files must be in the following format:
• WAV or MP3 format
• Smaller than 200 MB
File names must be limited to 32 characters, with no spaces.
For further instructions, reference the Custom Tone Conversion and Upload Guide.
System Log
System log files are automatically created and can assist with troubleshooting if the device does not behave as expected.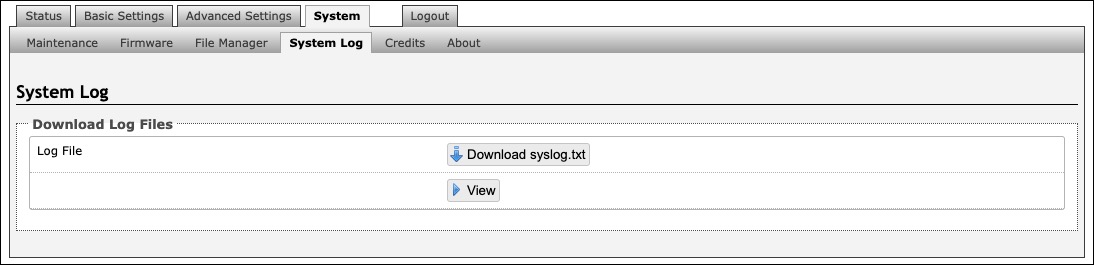
Log Out
Log out of the web interface.
FCC Compliance Statement
This equipment has been tested and found to comply with the limits for a Class A digital device, pursuant to Part 15 of the FCC Rules. These limits are designed to provide reasonable protection against harmful interference when the equipment is operated in a commercial environment. This equipment generates, uses, and can radiate radio frequency energy, and if it is not installed and used in accordance with the instruction manual, it may cause harmful interference to radio communications. Operations of this equipment in a residential area is likely to cause harmful interference, in which case the user will be required to correct the interference at their own expense.