Introduction
This guide outlines the steps required to configure the 8300 Controller as an HTTP or HTTPS provisioning server. Besides being capable of monitoring and supervising hundreds of Algo IP Endpoints (see the User Guide for more details), the 8300 may be used as a provisioning server for mass deployments and firmware upgrades. Furthermore, it is possible to send API requests to one or multiple monitored devices to perform different actions.
Adding Devices to the Dashboard
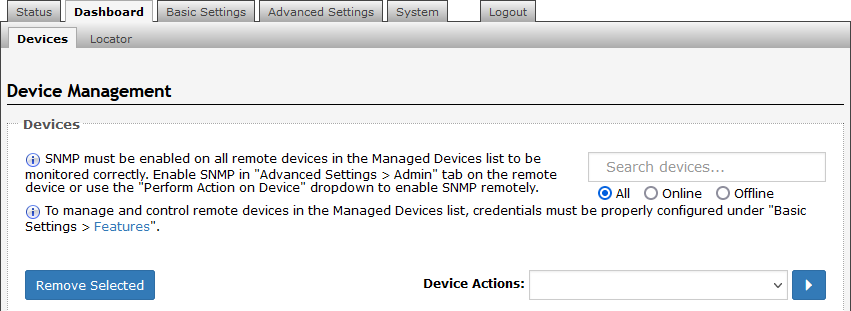
The Dashboard is where users can check the status of monitored endpoints and set Device Actions to update settings, reboot monitored devices, and more.
Browse to the 8300 web interface, log in, and go to Dashboard → Locator tab.
Add the Algo endpoints to be monitored by navigating to the Locator subtab.
The locator will find all Algo IP endpoints in the network. You can also add them manually.
Note
The locator is not able to find endpoints in different subnets or VLANs, even if routing is in place. These must be added manually.
The following Algo first generation IP endpoints may not be visible through the 8300 locator. You may need to add them manually.
8180 SIP Audio Alerter (G1)
8128 SIP Strobe Light (G1)
8028 SIP Doorphone (G1)
8061 IP Relay Controller
Configure RESTful API
Enable RESTful API for the 8300 to send API commands to the monitored devices.
To configure RESTful API:
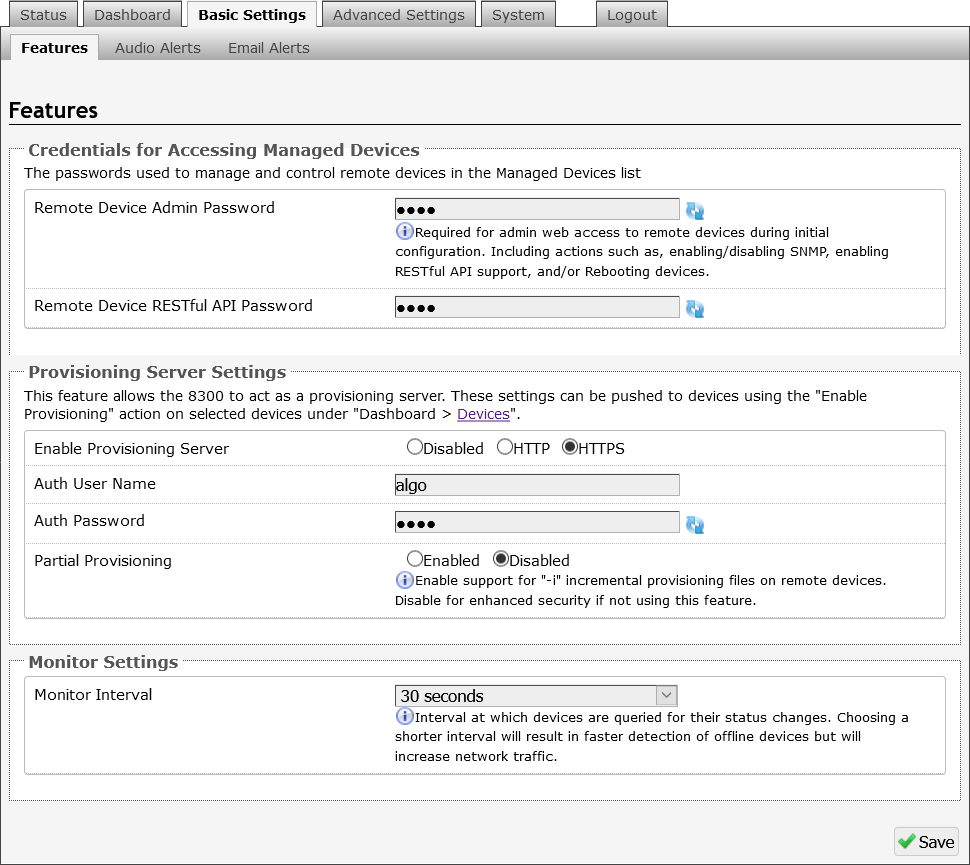
Go to Basic Settings → Features tab.
Set the Remote Device Admin Password and Remote Device RESTful API Password (default is algo).
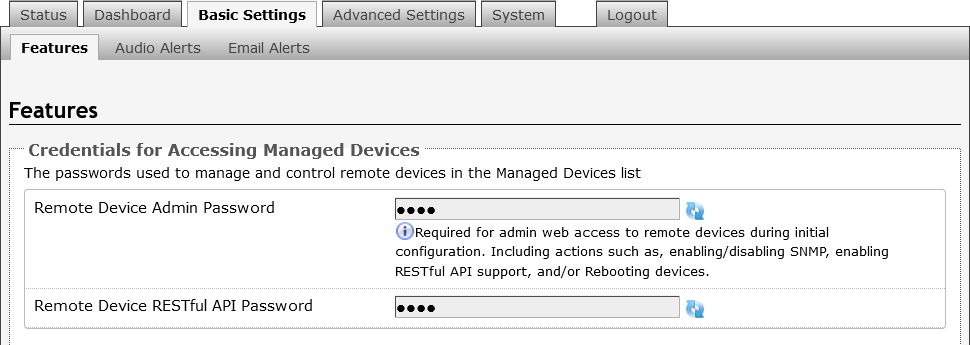
Save the changes.
Go to Dashboard → Devices, and use the Device Actions dropdown box to:
Enable SNMP (not required but recommended)
Enable REST
Note
Wait for remote device(s) to reboot after each of the above steps. The reboot process takes about 1 minute.
Configure Provisioning
All Algo IP devices support provisioning, which is detailed on the Algo Provisioning webpage. The 8300 can act as an HTTP or HTTPS provisioning server to host firmware files, configuration files, tone files (WAV or MP3), and certificates for mutual authentication. This is a simple and effective method to configure multiple endpoints.
To configure provisioning:
Log in to the 8300 web interface and navigate to Basic Settings → Features tab.
Go to the Provisioning Server Settings section.
Enable Provisioning by selecting HTTP or HTTPS mode.
Set the provisioning server Auth Username and Auth Password.
Optional: Partial Provisioning may be configured. See the Algo Provisioning Guide for details.
Note
1 GB of storage is available on the 8300. Firmware files may be as large as 100MB. Make sure to manage available storage and delete old files as required.
Navigate to Dashboard → Devices and Enable Provisioning from Device Actions.
Adding or Deleting Provisioning Files
After you enable provisioning, a folder named prov is available in System → File Manager. You can add or delete provisioning files.
All file names must be formatted as described in the Algo Provisioning Guide.
To add a provisioning file:
Go to System → File Manager → prov folder.
To add a provisioning file, drag and drop the file into the prov folder.
Once the configuration file has been added to the prov folder, the endpoint can be rebooted.
If the steps above have been completed, the endpoint will load the configuration file from the 8300.
Go to the Status page of the endpoint and check the Provisioning Status. This should be listed as Successful.
If it shows as None Found then please check that all previous steps have been completed or contact Algo Support.
To delete a provisioning file:
Go to System → File Manager → prov folder.
Select the Delete icon
 of the desired file.
Device Actions Options
From the main dashboard (Dashboard → Devices tab), several Device Actions can be selected and pushed to one or multiple devices.
|
|
|
|
|
|
|
|
|